Sunday 27 February 2011

The Hands Part4- Finishing

Now that the profile of the minute hand is frozen, the two hands can be hardened. This is done by heating to red & quenching in water. The hands must be bound in wire since the heat treatment can distort them. After hardening the hands are tempered to spring. This ensures that they will retain their shape throughout the finishing process & indeed when the watch is serviced.

After tempering the absolute final shaping is done with the escapement files.


Then the flanks & top surfaces are finished with paper and the edges are bevelled.

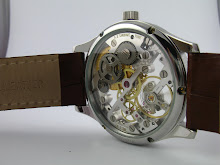
This is the result........

A close-up...

Now all that remains as far as the hands are concerned is bluing.

Aditya

Friday 18 February 2011

The dial (mounting) & hands (shaping)

We have reached a stage where things start coming together. I need to give the hands their final shape for which they need to be in the watch for which the dial needs to be mounted on the movement for which the dial markers need to be finalised....... whew, that's a lot of work :-)

So, the first thing I need to do is drill the holes for the taper pins in the dial marker feet. Please note that the marker feet are 1mm in diameter and the hole is 0.4mm.
Here is the marker with the hole drilled and the head roughly sized in the table drill.

The 3 & 9 o'clock markers are just that, dial markers. So they are similar in this regard. The 12 & 6 o'clock markers also double up as dial feet. In addition to this the plate thickness under the two is different. So the holes are at different locations.

After this the markers are hardened & tempered. Below you can see them after the heads are further turned down a bit.

And below you can see the dial mounted on the movement, hands sized, minute hand bent, installed & the entire assembly cased up.

I use a drop of oil on the minute hand to check if it clears the crystal.

Here's the final profile of the hands.

Next time I will write about finishing off the hands.

Aditya