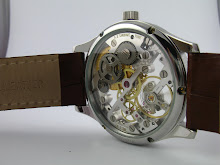
Anyway, since I have not made much progress on 02, I shall write about a hook I made for an English pocket watch fusee chain some time ago.
This is one of the most adventurous repairs I have carried out so far. It took me several attempts to get it right. The pictures are from several different attempts so they might not 'add up', as it were. But they do tell the story coherently, so here goes.
As I have already stated I only have silver steel in rod form, so the first job is always to prepare a little piece. The idea is to thin down the piece but not so much that filing will bend it.

The next operation is to drill the hole where the chain will be attached. This acts as a good reference point for subsequent shaping. I did not have a bit small enough for this so the only option was to make one. This was easier said than done. I made the bit out of an old needle. All goes like clockwork till the tempering process. The whole thing about making tiny drill bits is the tempering. One almost always tempers too little (so the drill bit is too brittle) or too much (in which case the drill bit is too soft). You will understand what I mean when you see the next picture. It took me 15 attempts to get the temper right. The next day my wife was perplexed by the disappearance of half the needles from the sewing kit :-)

Here is number 15......
 ..... and the hole in question.
With that out of the way I could shape the hook part. This hook is for the barrel end. barrel hooks always have the extra horn at the end. The hook at the fusee end has a much simpler shape. I do not quite know the reason for this. Logically, it should not matter which way the chain is mounted in the watch. In fact, some chains I have seen, with older repairs, have had both fusee ends and they work just fine. Perhaps the horn helps the chain to stay upright on the barrel.

The shape of the hook is critical. This is because this hook is attached to a hole in the barrel and carries the entire force of a wound spring. An incorrect profile will only make the hook slip out. Here is the hook with more or less the correct shape.

After this I thinned it down to almost the required thickness. This is done in the usual manner with polishing paper on a glass sheet. Here is the hook with the chain and the broken hook. Please note the rust on the last few links. These were removed, a chain in only as strong as the weakest link :-)

At this stage I tried the hook 'in-situ'. This is important since adjustments are difficult after hardening.

Below you can see the hook after hardening. Any steel part must always be bound when it is hardened. The hardening (heating to cherry red & quenching in water) process invariably distorts the part. Binding wire helps to retain the shape.

Next, the hook must be tempered. It is too brittle directly after hardening. A foolproof method of tempering steel to spring is to boil it out in motor oil.

And here you can see all the parts together. The hook has been cleaned up. The broken hook & rusty links have been removed from the chain & please note the tiny pin that has been filed up for the joint. This pin has a slight taper.
 Here is the hook & pin on the chain. The pin needs to be filed down further before it can be riveted.
And here is the hook riveted to the chain.

Looks simple but this exercise took a lot of my time. Of course, I learnt a lot along the way.
Aditya